Here's how I make my bags....
For the purple bag above I used about 300g - it's quite good to split the colours in half so you know you have the same for each side.
I put one or more pieces of sari silk onto the resist.
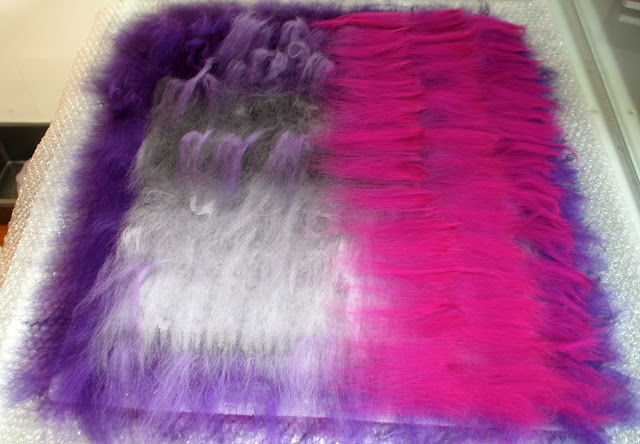
I put a very fine wispy layer of merino fibres on top of the silk and I place the colours I want to see at the sides. Then I lay down a fine layer around the edge - overlapping about 3 to 5 cm. I then put down one vertical layer (Or you can do the horizontal layer first if you prefer).
Then one horizontal layer, covering the resist only. So only one layer is going to overlap the resist. I then wet, cover with bubble wrap, rub to spread the water and to gently push out any trapped air. You want to avoid moving the sari silk.
Then holding the top layer of bubble wrap, the felt, the resist and the bottom layer of bubble wrap I flip everything over.
I put the second piece of sari silk on the resist and again put a thin wispy layer over this and on the resist at the sides before folding the edges over, as tightly as possible. I then repeat what I did on the first side -laying down a thin layer at the edge, overlapping the sides, then one vertical and one horizontal layer.
l repeat the above two more times.
So in total there are six (fairly thin) layers each side with six overlapping layers.
When all the layers are finished and folded over I start to rub everything, alternating rubbing with my hand and rubbing with a scrunched up plastic bag. I pay particular attention to the sides. I then roll it up around a piece of pipe insulation and roll from all directions until the resist begins to buckle.
I cut the top open which allows the resist to come out a little but I leave it in and continue to roll.
When it is quite well felted I remove the resist and carefully turn inside out. I then roll some more, followed by carefully dropping on the table onto bubble wrap - I sometimes go and do this in the bath - the felt in the bath - not me!
I then roll some more and when it is fully felted I roll it with a rolling pin since I like to get it as smooth as possible. Then whilst it is still wet I mould it into the shape I want my bag. If I'm using a frame I put it in at this stage since the felt does shrink a little as it dries.
Here's the finished bag.
I was surprised how purple it turned out - I had used some grey under the resist but like the effect.
And here are a few pictures of another bag - I got a bit carried away with the making and didn't take many photos.


They are gorgeous! The silk you used really works well with the style of the bags. The handles look great like that too :)
ReplyDeleteThanks Zed, I was making the handles by knitting 6 or 7 stitches in stocking stitch and letting it curl naturally but have recently been given some good advice to try knitting them as i-cords - either using double pointed needles or a french bobbin - so I'll give that a go next time.
ReplyDeleteLove these. Very delicate and subtle colours in the second bag.
ReplyDeleteThanks. When it came to it I couldn't part with the second bag! I justify it by thinking it's good to test what I make!
Delete